Lauren on Living

A Lifestyle Blog about Simplifying Healthy Living

  • Home
  • Health
  • My life
  • Recipes
  • Hire Me

Halloween 2015

November 1, 2015 by lauren.anvari@gmail.com Leave a Comment

Rafaan and I love a good DIY costume. In fact we’ve never done anything else. This year these lucky kids got to wear two different costumes. I originally asked Raf’s mom if she wouldn’t mind making their costumes this year but then after she agreed and had nearly completed them Raf decided he really wanted to make them Doc Brown and Marty McFly costumes. So we put together these Back to the Future costumes and totally geeked out while doing it. I made Bennett’s wig using a feather boa, hot glue and her new born hospital hat. I then made her lab coat out of a white t-shirt, hot glue and fabric markers. Raf made Asher’s hover board using a template that he found online and printed out, poster board, foam, construction paper and felt. They were a huge hit!FullSizeRender (22)FullSizeRender (21) FullSizeRender (23)

The costumes that Mamani made them were these adorable firefighter and dalmatian costumes. They wore them to their preschool co-op halloween parade and it was pretty gosh darn cute. Unlike the ones we made, these costumes are so well made that I’m sure the kids will get a lot of use out of them playing dress up. YAY!

IMG_8950 IMG_8951

Here’s a look at Asher’s halloween 2014 jedi knight costume that we threw together the day of Halloween. He was so little!

2014-10-31 07.04.09 2014-10-31 07.06.02 2014-10-31 07.06.41

Filed Under: DIY Projects, My life Tagged With: baby costumes, back to the future, dalmatian, DIY, diy costumes, doc brown, fire fighter, Halloween 2015, jedi knight, marty mcfly, toddler costumes

DIY Nursery Elephant Lamp

January 9, 2014 by lauren.anvari@gmail.com Leave a Comment

IMG_7528

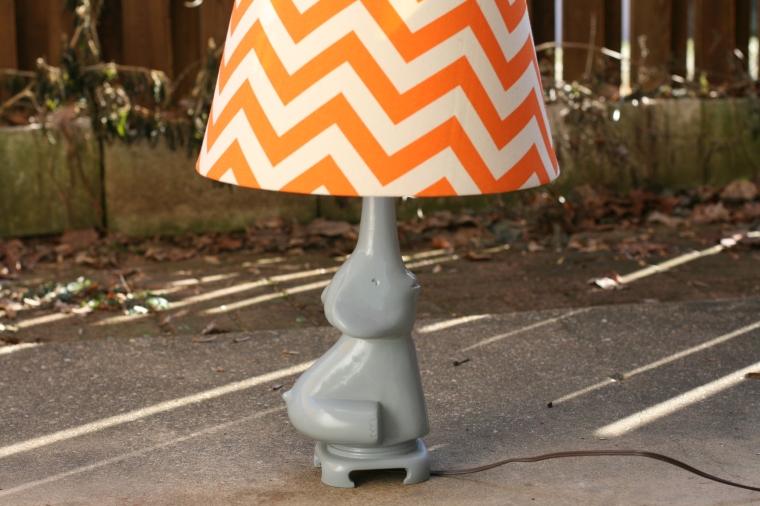
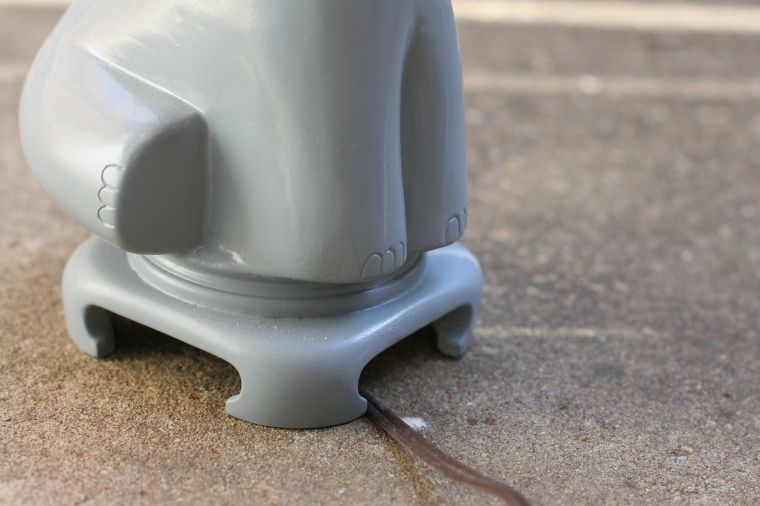
This post is long over due, but here it is at last.  I was inspired by this DIY elephant lamp that Joy Kelley over at HowJoyful.com did.  I totally fell in love with the lamp and knew that I had to make one for Asher’s room.

Originally I asked Raf if he would carve the elephant shape from the styrofoam and I would then do the rest.  Well after he finished carving the shape he decided that he didn’t want me working with the plaster and spray paint while pregnant (although I think he was really just having too much fun being crafty).

We started with a thrift store lamp that we had to disassemble and then put back together again.  However in the process one of the bolts got left out.  We didn’t realize the bolt was missing until the lamp was complete and so sadly this lamp is quite wobbly and I don’t think it will survive the onslaught of time but nonetheless, I absolutely love it!

We just followed Joy’s directions although, Raf ended up needing to add more coats of wall plaster than she did.  If you’re interested in making your own, check out her original post, here.

IMG_7521

IMG_7524

IMG_7527

IMG_7522

Filed Under: DIY Projects Tagged With: chevron, daddy do it, DIY, DIY elephant lamp, Do it yourself projects, elephant, grey, lamp, lamp shade, nursery, orange

DIY Cloud Mobile

December 1, 2012 by lauren.anvari@gmail.com 1 Comment

Cloud Mobile

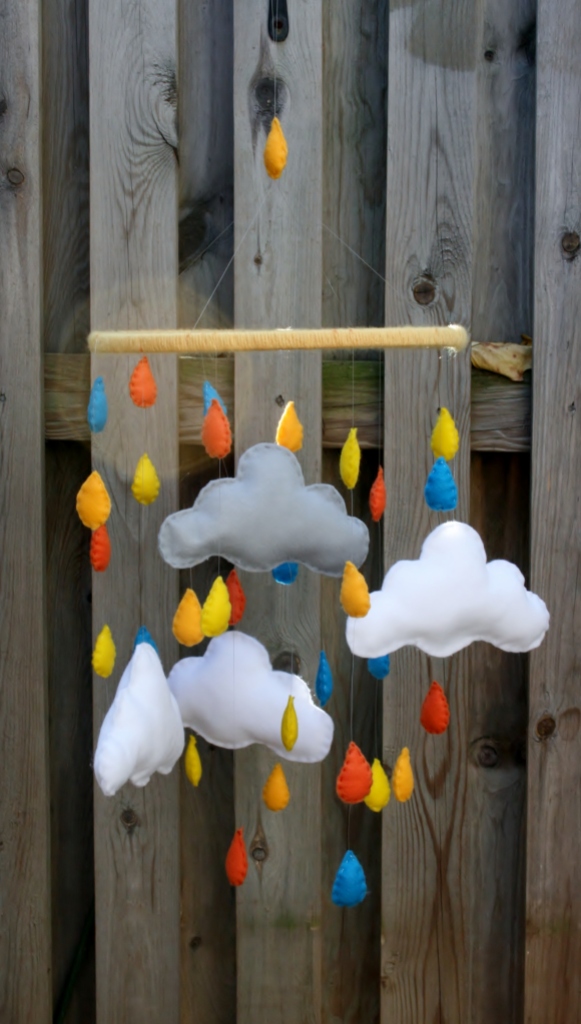
I just finished working on the Could Mobile for the Little One’s nursery.  I got my inspiration from here.  It was a fairly easy project and I absolutely love the way it turned out.  I think it’s so whimsical.  (Sorry for the sun glare spot in the photograph).

I didn’t document the process like I should have, so I’ll do my best to describe it to you here so that you may be inspired to do something similar yourself.

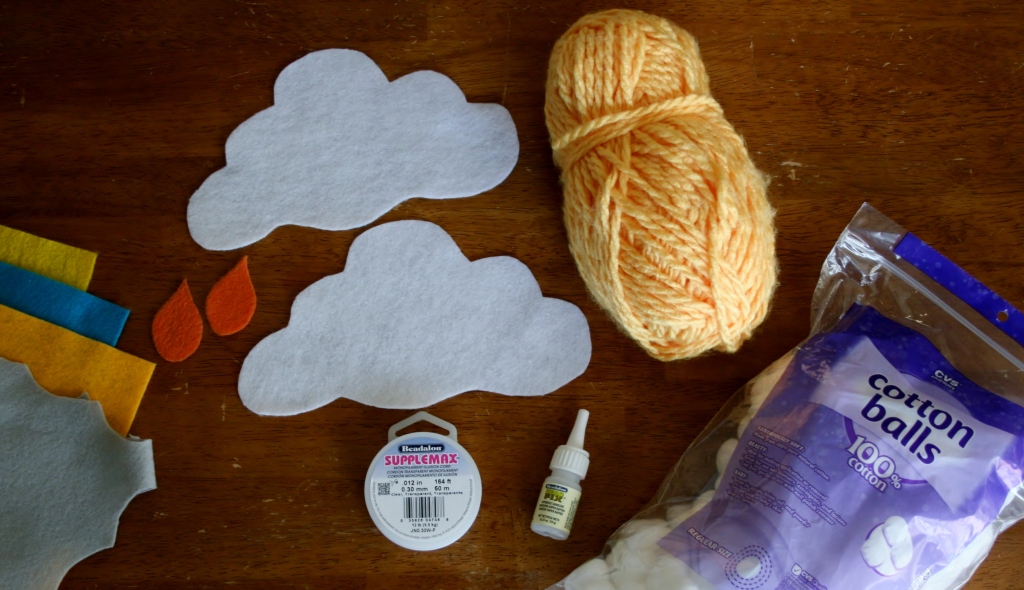
Here’s what you’ll need:

Cheap embroidery hoop

Felt squares

Fish line or illusion cord (I used .30mm clear)

Cotton balls

Yarn

Needle & thread

Super glue

Duct tape

supplies

So the first thing I did was pry the little screw and metal thing off the embroidery hoop, you don’t have to do this, but I wanted a smooth circle.  The hoop I used only had one ring of wood meaning it didn’t have an inner ring of wood, I paid under $2 for it.

After prying the metal screw thing off, I used the duct tape to secure the two sides together.  I then wrapped the hoop tightly in yellow yarn.

Next I drew one cloud on a piece of felt and then cut that out, I then used this as a template to cut out the rest of the could shapes, you’ll need to cut out two clouds for each cloud you intend to make, as you can see, I made 3 white clouds and 1 grey cloud.  If you prefer to have clouds that are different shapes, you could always do that too.  After the clouds were done I drew a rain drop on some colored felt and then cut that out and used this as a template for the rest of the rain drops just like I did with the clouds.  The colors in our nursery are orange and turquoise  which is why I chose the 4 colors that I did.

I then sewed and stuffed the clouds and rain drops.  To do this I used a needle and regular thread and I stuffed them with cotton balls, but I’m sure that polyester toy fill would have worked better, I just didn’t want to buy a MASSIVE bag of it so I went with cotton balls.

After all my clouds and rain drops were sewn and stuffed I used the illusion cord and a needle to string them to the hoop.  I then went around and put drops of super glue on all the places where I tied off and cut the cord just to make sure that it wouldn’t come loose.

BAM! Cloud Mobile for $20.

Filed Under: DIY Projects Tagged With: cloud mobile, crafts, DIY, embroidery hoop, felt, mobile, nursery, rain drops

about

follow/contact

  • Email
  • Facebook
  • Instagram
  • Tumblr
  • Twitter
  • YouTube

categories

Copyright © 2025 · Foodie Pro Theme by Shay Bocks · Built on the Genesis Framework · Powered by WordPress